
The Real Lessons Learned After Three Years of Pitfalls in Bar Lighting Installation Projects

I never believed any friend who swore “Bar construction is simple, just hang the lights and you’re done.” Until I spent half a month on site, watching electricians and carpenters argue over a single lighting channel routing and a smart dimming system flickering for a week after installation, I realized that bar lighting work is not just about hanging lights—it’s an extreme tug‑of‑war involving acoustics, power, and commercial logic. This article contains no “perfect solution”; it’s a raw record of the mistakes I made, the fixes I applied, and the barely‑scraped‑together results from my own projects.
The Hidden Trap of Budget Overruns – The 30% I Underestimated
The first blow came much faster than I expected. When I took on my first bar lighting project, I set a fixed budget of 400,000 CNY, assuming that lighting fixtures, cable laying, and installation & commissioning would each take a share—logically sound. Yet before the hard‑fit work was finished, additional settlement notices kept coming—material waste rates were almost double the estimate, cable loss increased by two bundles because the routing path changed on site, and a fixture base had to be swapped due to incompatible wall structure, costing an extra 5,000 CNY for rework. In the end, the 400,000 CNY turned into 630,000 CNY.
Looking back, I found that the industry‑wide on‑budget completion rate is only about 45 %—a figure verified with several peers, not some internet statistic. The real budget eaters are never the fixtures themselves but the items hidden in “contingency” that you think you’ll rarely use. Back‑filling of concealed works, trenching for power and low‑voltage ducts, reinforcing embedded fittings—these are just lines on a drawing but become whole walls of demolition and reconstruction on site.
When tightening the budget, the least cuttable items are fixture bases and cable quality. In one project I tried to save by using ordinary flame‑retardant conduit; three months later the cables degraded, causing dimming signal distortion, and we had to replace everything, with the ceiling‑removal cost ending up three times higher than the savings.
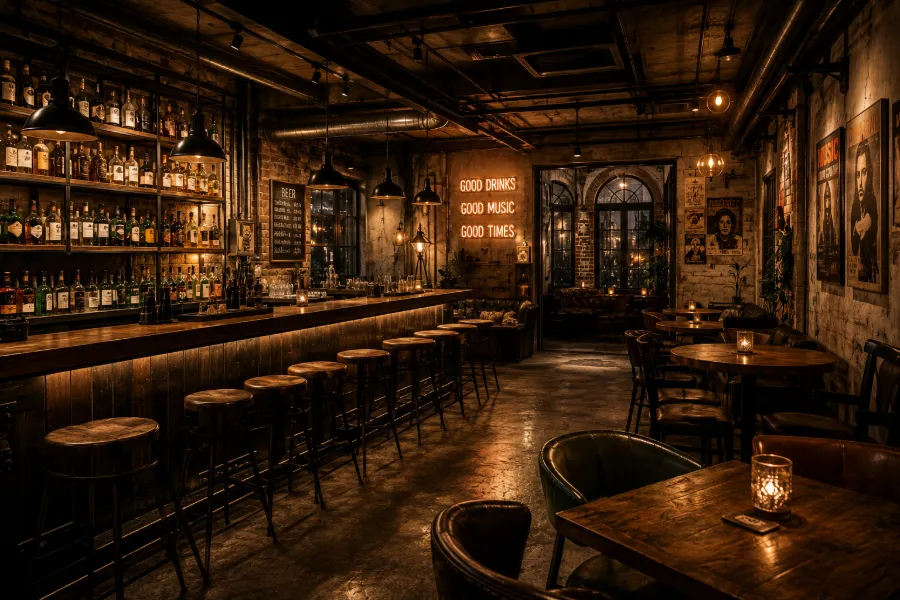
When the budget is under control, the visual result speaks for itself—the finished‑project photo above shows a budget that didn’t blow up. But if you only tell the contractor “save as much as possible,” they will cut corners where you can’t see, and the real cost will be paid later during operation.
The Real Wall Between Design Drawings and On‑Site Reality
The designer’s concept images were spot‑on—dark industrial vibe, accent lighting on the bar, hidden strips on the walls to create atmosphere. I signed off feeling confident.
When we started laying out, the electrician used the drawings to mark lines on the wall and discovered that the ceiling maintenance hatch blocked the main lighting channel route. The installation height was off by 5 cm, and the light‑shielding channel had a 3 cm size error—initially I thought it was fine, but once a spotlight was installed, its halo hit the ceiling and ruined the whole ambience.
The strip‑lighting failure in this project left a deep impression. The designer specified 3000 K strips with high CRI, but the construction crew ordered 4000 K regular‑temperature strips and no one verified the actual product before installation. On the night of the lighting test, the bar area was bathed in cold white light that clashed badly with the surrounding warm‑tone walls. We had to tear it out and redo it, losing two weeks of schedule and 30,000 CNY in rework costs.
After that, I set a rule: lighting embedded positioning must be completed before the carpenters close the panels, using a laser level to mark points and photographing them for records. The “wall” that separates design delivery from construction delivery can’t be crossed with a few dashed lines—you need to tell the contractor the depth of the light‑shielding channel, the halo control angle, and the reserved location of the DMX512 signal cable, none of which ever appear on a concept image.
If you’re also wrestling with on‑site details, check out this real bar‑counter lighting case study. Their routing and embedding methods are far more reliable than my first version. I also explored the 2026 lighting design trends and found many new projects now consider construction feasibility from the start instead of fixing things after the fact.
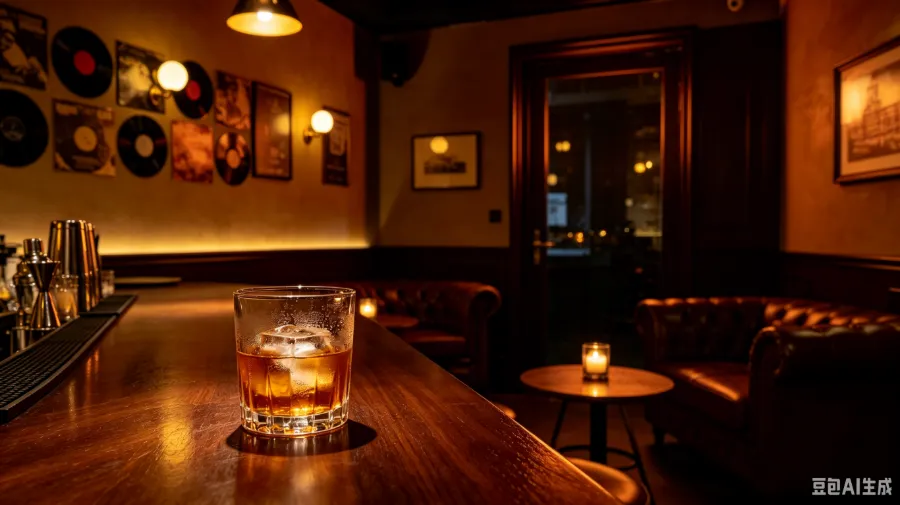
The quiet bar in the photo above was a small follow‑up project. Because we did the embedding positioning and color‑temperature verification in advance, the final result matches the design image almost perfectly. You see, the “white space” left by construction isn’t a pit to fill; it’s a control authority reserved during the design phase.
Collaboration Blind Spots in the Construction Team – Nobody Understands the “Lighting Reserved Locations”
One project left a strong impression. When the electrician arrived, I gave him a “lighting reserved location map” showing every fixture’s junction box and signal cable route. He glanced at it, said “OK,” and then, following his habit, ran both power and DMX512 control lines in the same duct.
The carpenter arrived next, saw a square opening in the wall thinking it was a maintenance hatch, and sealed the duct with drywall. When the lighting installer arrived, they discovered severe signal interference caused by the mixed power‑low‑voltage duct, and the carpenter had sealed the embedded‑fitting mounting points. The three parties stood together, each refusing to admit fault.
This isn’t an isolated case. Industry data I later learned shows that lack of shared project information adds an average delay of about 18 days. What does 18 days mean? For a bar, one day of closed operation can easily cost over ten thousand yuan in rent and labor.
The lesson I learned: create a construction hand‑off checklist that every party can read, using pictures with dimension annotations instead of text. The checklist should clearly state power‑low‑voltage separation requirements, exact coordinates of duct reservations, and load parameters for embedded fittings. I even drew a physical reference diagram, attaching a photo of an embedded box with a label “Do not seal here.”
If you’re handling an old‑venue renovation, it gets even messier. I wrote about that in my article on key experiences when renovating an old bar, where we discovered that the previous owner never installed any lighting conduit. The old walls were filled with tangled junk wires; the electrician spent two days sorting which could still be used.
A quick vent: one day the carpenter spent fifteen minutes looking at my hand‑off checklist, then looked up and asked, “How wide should this duct be?” I showed him with a ruler, and he replied, “Oh, just a hole.” Later I learned that the lighting, electrician, and carpenter should all be present during the layout stage, marking everything on the spot so no one runs away.
If you’re interested in the design method for this stage, check out professional bar design references, where the hand‑off phase is far more standardized than my early attempts.
Lighting Commissioning Is the Real Hell Mode – Flicker, Disconnection, and Wrong Color Temperature
The day the equipment was installed, I felt the job was done. As soon as power was turned on, the whole system started flickering—all LEDs flashing like a club’s “dance mode.” After three days of investigation, we found the DMX512 controller’s signal cable was too close to the power line, causing interference. Re‑routing solved the flicker, but the dimmer only worked with half the fixtures; the other half either didn’t respond or jumped in brightness.
That week I camped on site, constantly tweaking parameters on the lighting console. The control system had to be rebooted at least five times—signal loss would black out an entire zone, requiring a power cycle. Later I hired an experienced dimmer technician who used an oscilloscope to capture the signal waveform, discovered a compatibility issue between the constant‑current driver and the protocol, and replaced the driver module to stabilize the system.
During commissioning I hit another snag: the same batch of LED beads showed completely different brightness decay curves when installed at different heights. Fixtures 2.4 m above the bar performed normally; ceiling spotlights above 3 m lost half their brightness. This wasn’t a lamp issue; it was a lack of illuminance simulation before installation.
Bilibili: https://www.bilibili.com/video/BV1K3LA64Eyt/?spm_id_from=333.1387.homepage.video_card.click
The video above shows a lighting‑synchronization test scene—audio, screen, and dimming system working together. You can see each light group’s response time is virtually zero latency. Achieving this requires that pre‑routing, compatibility testing, and driver selection all pass inspection.
During the commissioning phase I heavily borrowed mature test checklists and tool configurations from the industry, including VYLEN’s equipment commissioning manual. Using their VYLEN assistance tools, I ran a complete signal‑compatibility inspection—from protocol matching to EMI testing—far more efficiently than blind troubleshooting.
Another often‑overlooked cost of commissioning is time. Many only calculate equipment purchase costs and ignore labor and downtime during commissioning. If you try to save that money, you’ll likely end up like my first version: install, dismantle, re‑install, and spend more overall. Later, when I took over a NEBULA bar project, I followed the NEBULA bar daily traffic >300 case study commissioning process, prepared a compatibility matrix in advance, and cut the commissioning period by almost half. VYLEN’s maturity in signal commissioning also illustrates why professional tools can reduce on‑site issues by 80 %—this isn’t advertising, it’s a conclusion drawn from practice.
FAQ
Q1: What is the most easily overlooked hidden work in bar lighting installation?
Power‑low‑voltage separation and pre‑embedded signal cables are the most neglected. Many crews bundle all wires into one duct, causing dimming signal interference, flicker, or disconnection. Mark duct separation requirements clearly in the construction drawings and perform a signal continuity test before closing panels.
Q2: What should I do if the as design and the on‑site result differ significantly?
Check three points first: fixture installation height per the drawings, accuracy of the light‑shielding channel dimensions, and whether the color temperature matches the design. Differences over 20 % usually stem from sealing drywall before the embedded positioning is done. The most effective solution is to complete a lighting layout mock‑up and photograph it before the carpenters arrive.
Q3: How to troubleshoot flicker during the lighting commissioning stage?
First confirm whether the DMX512 control line and power line are mixed. If there’s no physical separation, re‑routing is the only solution. Next, verify driver and protocol compatibility. Use an oscilloscope to examine the signal waveform and eliminate interference or attenuation sources.
Q4: What are the differences between lighting work for an old bar renovation and a new build?
The biggest pitfall in old‑bar renovation is discovering after wall demolition that existing conduits are aged or abandoned. Embedded locations may be unusable, requiring at least a 30 % increase in demolition‑and‑reconstruction budget. Additionally, the old wall’s load‑bearing structure may not support new fixture bases, extending the re‑work period by 2–4 weeks compared with new construction.
Q5: Can a low budget still achieve an atmospheric bar lighting?
Yes, but the money must be spent where it matters most. A minimum budget of 400–600 CNY per square meter is advisable, focusing on a stable dimming system and correct strip color temperature. Wall paint and decorative items can be simplified, but you cannot skimp on light‑shielding channels, wiring ducts, or driver modules—saving on these three aspects will be quickly eroded by frequent fault repairs within the first half‑month of operation.
Share Article