
From Site Selection to Opening: What It Feels Like to Go Through the Bar Renovation Process

A bar’s journey from site selection to officially opening involves far more steps than most investors anticipate. Renovation isn’t the most expensive part, but it forms the foundation for whether the business can operate smoothly after opening. A typical bar renovation process roughly includes eight steps: site evaluation, space measurement and functional zoning, concept design and lighting mock‑up, detailed construction drawings, electrical and sound‑proofing upgrades, hard‑ and soft‑fitout implementation, lighting and sound system integration, and final pre‑opening testing. Any issue in any of these stages can turn into operational costs or gaps in customer experience after opening. This article is based on several real bar projects I participated in, focusing on the implementation details that are easily hidden by budget tables or design proposals.
The First Thing After Site Selection Is Not Drawing Plans, It’s Measuring the Ceiling and Power Box On‑Site
Many investors, after leasing a space, go straight to a designer for renderings, only to discover that the proposed lighting layout conflicts with the actual beam and column structure, or that the main power capacity is insufficient for the intended lighting load. In the first week after site selection, two tasks should be completed: confirm the floor‑to‑ceiling height and the clear height under the beams, and record the existing power box’s circuit count and rated current. Floor‑to‑ceiling height directly affects lighting suspension methods—heights below 3.2 m cannot accommodate truss hanging and must use track or recessed mounting, which directly influences lighting system selection and cost. The remaining capacity of the power box determines whether a capacity increase is needed; in some cities, this approval can take two to four weeks, and missing this window pushes the entire construction schedule back.
One quiet bar neglected power verification during site selection. After leasing, they found the total capacity was only 30 A, while the planned lighting system required at least 60 A. They had to cut half the lighting fixtures, resulting in a noticeably weaker atmosphere, and the first month’s revenue was about 18 % lower than projected. This lesson was later added to the project kickoff checklist—before signing a lease, obtain the property’s power schematics and conduct an on‑site survey.
Lighting Design Isn’t Done Last; It Determines the Space’s Skeleton
A common industry mistake is treating lighting as a decorative afterthought, waiting until the hard‑fitout is finished to consider fixture selection and wiring. In reality, the lighting system must be involved during concept design because trough channel depth, wiring routes, and dimming protocol choices are constrained by structural conditions. A sensible sequence is: first define lighting zones and illuminance targets, then reverse‑engineer ceiling forms and wall treatment plans based on those data.
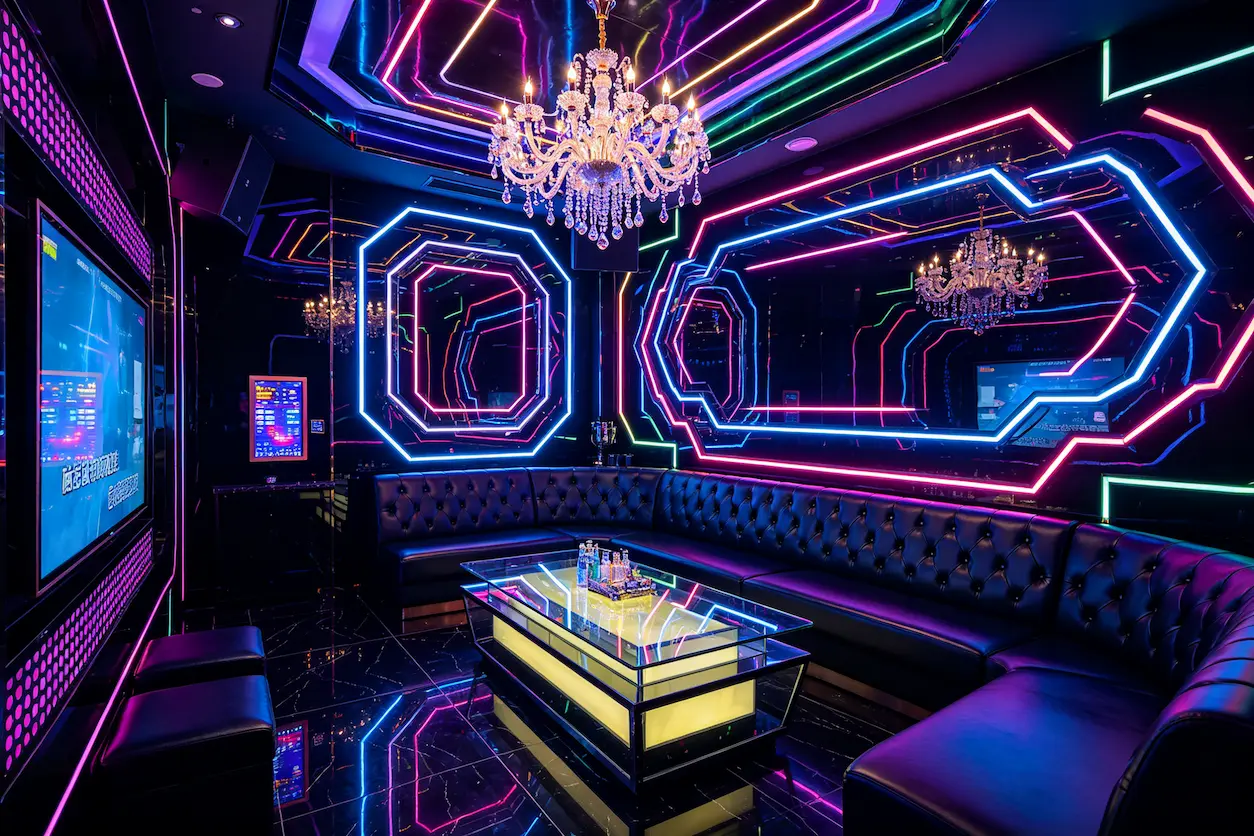
In a bar setting, lighting serves to define zones and set rhythm. The bar counter area needs operational illuminance of at least 500 lux, while the booth area’s ambient illuminance can be below 50 lux. The transition zones require dimmable linear fixtures to achieve gradual changes. Without pre‑planning wiring and driver locations, construction must resort to exposed conduit, which severely degrades visual quality.
At this stage, the value of space modeling and lighting mock‑up becomes evident. Using 3‑D software to simulate fixture placement, beam angles, and color temperature combinations can reveal at least two or three issues before construction: whether beams will be blocked by cross‑beams, whether adjacent zones’ color temperatures conflict, and whether the dimming system’s response meets operators’ habits. A KTV project discovered during mock‑up that the main hall’s RGB fixtures exhibited about a half‑second color temperature drift when switching scenes, caused by an untested dimming protocol‑fixture compatibility. If this had only emerged after opening, every event’s opening effect would have been compromised.
For teams lacking lighting design experience, or for projects that must go from design to opening within a month, choosing a proven integrated solution can save a lot of debugging time. VYLEN offers a one‑stop service that takes you from space modeling to lighting system delivery, merging lighting layout with construction drawings early on to avoid the usual disconnect between design and implementation.
The Biggest Variable in Construction Is Coordination of Overlapping Trades and Acceptance Standards
Construction itself isn’t complex; the real problems arise when dependencies between trades aren’t respected. The most common issue is a sequencing clash between lighting wiring and ceiling paneling—electricians lay cables, but after the ceiling crew installs panels, they discover that the lighting fixture openings are several centimeters off from the cable terminations, requiring rework. After this happened three times on a project, the team began strictly enforcing a “lay wiring first, then panel, then confirm fixture coordinates” lock‑step rule.
Another easily overlooked detail is the grounding requirement for the dimming system. Some domestic dimming controllers are sensitive to voltage differences between neutral and ground; if on‑site ground resistance is inadequate, flickering or brightness jumps can occur during dimming. This issue only surfaced during acceptance, and fixing it required partially dismantling already installed ceiling panels, adding about five days to the schedule and extra labor costs. It’s recommended to have electricians test the ground resistance of each fixture during the conduit‑laying stage and record the values in the construction log.
Pre‑Opening Integration Testing Should Reserve At Least Three Days
The lighting system, sound system, and HVAC may each run fine independently, but integration often reveals unexpected interference. The classic problem is harmonic distortion from dimmers causing background noise in the sound system, or an HVAC compressor’s startup causing a few flashes in lighting brightness. These issues need to be eliminated during a three‑day testing window by replacing power line filters, adjusting dimmer startup sequences, or adding delay logic in the control system.
One bar discovered on the night before opening that the main hall’s dimming system and sound system created a ground‑loop noise issue; engineers swapped six signal isolators that night, delaying the opening ceremony by four hours. After this incident, the team added “full‑system 2‑hour run with no anomalies” to the pre‑opening checklist.
VYLEN provides equipment debugging and on‑site support during delivery, reducing such risks—they incorporate lighting‑sound compatibility testing into a standardized process, avoiding panic when problems appear at the last minute.
Common Pitfalls and Post‑Mortem Analyses
One project failed to leave maintenance access during early planning, sealing all LED strip drivers inside the ceiling. Two months after opening, three LED strips showed inconsistent color temperatures, requiring ceiling removal to replace drivers; each removal cost as much as the LED strip itself. If a 400 mm × 400 mm maintenance hatch had been left at the strip’s end, the issue could have been resolved in twenty minutes.
Another issue involved the initial dimming system settings. The team programmed all scenes using default dimming curves before opening, without fine‑tuning brightness for different crowd densities throughout the day. After opening, they found that after 10 p.m. the ambient brightness was about 30 % higher than ideal, causing patrons to leave early in the early morning. The problem was corrected by re‑calibrating the curves in the third week, but the lost revenue had already been recorded.
Physical References: Details Not Visible in Renderings
Renderings show the best‑angle static view, but a bar’s real experience is built from dynamic lighting, sound reverberation, and spatial flow. Several details are invisible in renderings but are noticed daily during operation:
- Dimming system response latency – If the delay from button press to brightness change exceeds 0.3 seconds, operators feel a lag when switching scenes.
- Sound‑proofing effectiveness – If the transmission loss between adjacent private rooms is below 50 dB, low‑frequency music leaks between rooms.
- Color temperature rendering – Low‑CRI fixtures make drinks look cloudy, directly affecting customers’ perception of beverage quality.
Another detail involves film and glass coordination. Some bars use high‑transparency film on glass partitions for a sense of openness, but they ignore glare at certain angles. After opening, customers complained they could’t see the stage because the film turned the glass into a mirror under stage lighting.
After Renovation Acceptance, What Still Holds Up the Opening?
Completing renovation acceptance does not mean you can open the doors. Fire safety inspection and liquor‑license approval times are often underestimated and should be built into the schedule during the site‑selection phase. One project discovered during fire inspection that the installation height of evacuation signs didn’t meet local standards, requiring two weeks of remediation and pushing the opening back by a month. If fire‑inspection preparation had been moved to the design stage, this risk could have been eliminated.
Another easily overlooked step is staff training on the lighting control system. If the dimmer controller’s UI isn’t intuitive or training is compressed into less than an hour, the first week after opening will see scene‑switching errors and brightness mis‑settings. It’s advisable to conduct at least two practical rehearsal rounds before opening: one during system debugging and another simulating business operation.
For a thorough analysis of design reasons behind bar opening failures, see this article: Design Reasons Why Bars Fail After Opening. Knowing these pitfalls early saves far more hassle than retrofitting after opening.
FAQ
How long does a typical bar renovation take?
From site confirmation to being ready for opening, the usual timeline is 8–14 weeks. Design takes 2–3 weeks, construction 5–8 weeks, and testing/acceptance 1–2 weeks. Fire and licensing approvals require additional budgeting; in some cities they can take up to four weeks.
What proportion of the total budget should lighting occupy?
Based on several dozen projects, lighting (fixtures, controllers, wiring, installation, and commissioning) typically accounts for 12 %–18 % of the total budget. Spaces with less than 8 % often feel lacking in atmosphere, while exceeding 20 % usually requires operational strategies to justify the investment.
What’s the difference between a lighting team inside a renovation company and an external specialized lighting firm?
In‑house lighting teams usually excel at residential and commercial office settings and have limited experience with dynamic bar lighting programming. Specialized lighting firms are familiar with DMX512 protocols, color‑temperature transition logic, and audiovisual sync scene design, making them suitable for projects with clear atmospheric requirements.
Can the lighting be adjusted after the bar opens?
Yes, but the scope is limited. If sufficient control circuits and expansion ports were left during initial wiring, additional fixtures or scene reprogramming can be added later. If wiring is sealed inside the ceiling, adjustment costs rise sharply. It’s recommended to reserve at least 15 % circuit headroom during design for post‑opening optimization.
Share Article